|
Mugen
Palette Fix
|
|
OK Dez, these are the steps we take to fix the palette. Most of the work will take place in the 'color table' screen. Right, to start off, we need to make a palette images for all our components.This means that we make an image with a sample of all the colours in sprite. This is the first image and it is has all the basic colours for your Aguilay sprites. I would just like to note that the greys and black in your palette are very slightly coloured. This is perfect because we want to use 'pure greys' for our FX. Because they are slightly coloured there won't be a mix up in the SFF between the character colours and the FX colours.
This is the second image and it has all the basic colours for the summon character (actually, it may not have the correct colours as it is just an example). As like with the Aguilay image, none of the 'black' colours are actually black but very, very dark colours.
Now, we join up the two images to make one image. It has been converted to indexed colours and saved.
|
|
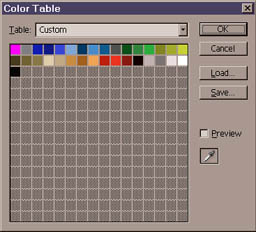
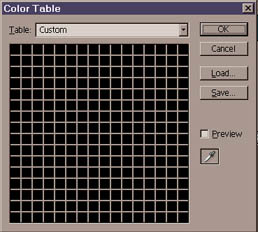
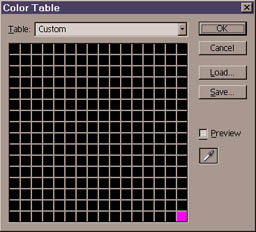
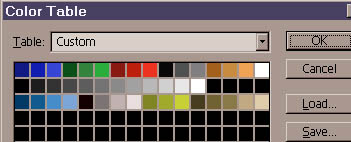
We now need to rebuild the palette so that it is easier to see and, later, work with. So what we do is go into 'Image> Mode> Color Table', which will bring up the colour palette for your image. You will notice that the colours are all mixed up so we are going to put them into a nice order. Make sure that 'preview' is turned OFF (IE unchecked) or you may have problems with rebuilding the palette.
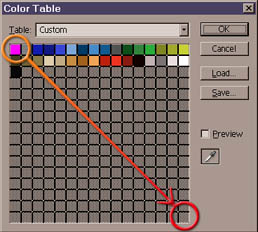
The first thing we are going to do is black out the whole palette. To do this, click on the top left-most box and hold and drag until you reach the bottom right-most box.
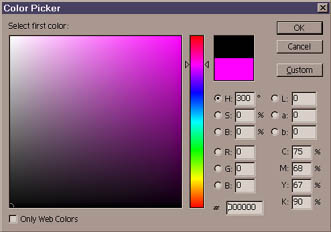
When you let go of your mouse button, the colour requestor will come up. Select 'black' (R=0, G=0, B=0) as your colour and press 'OK'.
The colour requestor should come up again a second time so just select 'black' as your colour and press 'OK' again. What has happened is that you've selected a range of boxes and shaded 'black' to 'black'. I will go more into detail later on this function when we make the FX colours.
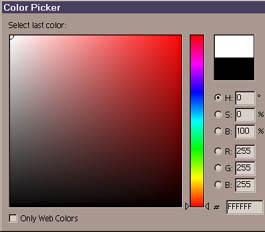
The next thing we do it set the background/transparent colour in the palette. Click on this bottom right corner box (the usual position for the Mugen transparent colour) and it should bring up the colour requestor. Move this requestor out of the way because we are not going to use it. Instead, more your mouse over your image and it will turn into a small crosshairs.
Click on the purple background then shift your colour requestor back and press 'OK'. This box should now be purple.
|
|
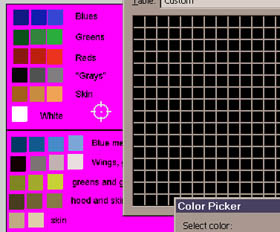
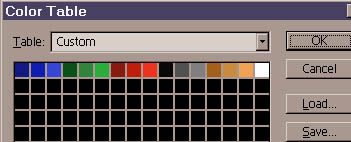
Now, we do the same thing with the rest of the character colours. Click the top left box, pick up the Top blue colour from the image and press 'OK'. Keep doing this until you have all the colours for your character taking up the top row of your palette.
Next, we will set the colours for the summon. However, I'm going to skip the second row because I want to leave it for the effects and go onto the third row. So, continue building your palette until your third row is filled up.
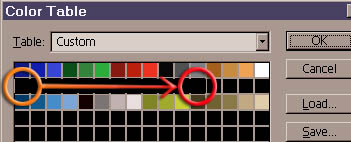
Lastly, we will make the colours for the FX. Select, the first box on the second row then click and drag until you reach the twelfth box (you can go further if you wish).
When you let go, the colour picker will come up. Select black (or a very, very dark grey) then press 'OK'. Now, when the colour picker comes up again a second time, select a white colour (or very, very light grey) and press 'OK'.
Now you should see a nice transition between the black and white colours you chose. You can do this with any two colours, really, but I've reserved the greyscale colours for the FX.
|

|
And, with that done, your global palette is made. Save it and press 'OK'. Close the image but don't save it because you only needed it for reference to make your palette. Plus, all the colours are screwed up and you don't really want that. After this, what you need to do is load up each image that you will use for your character, convert them to RGB then re-convert them to indexed colours BUT select 'custom' in your 'Palette' menu and choose your new global palette. Once you have done this, you reload the images into your SFF with the new palette. Done! Revanto |